
CVAD
YoLo v5로 실시간 object detection 해보기 본문
- 이번 포스팅은 해당 Git hub를 참고하여 진행하였습니다.
- 해당 포스팅을 진행하기 앞서, USB cam을 ROS로 연결하는 과정이 선행되어야합니다.
관련 내용은 Ubuntu 20.04에서 ROS를 통해 USB cam 연결하기를 참고하시면 됩니다.
이번 포스팅은 YoLoV5로 실시간 object detection을 진행해보겠다. 직접 모델을 학습해서 사용한다면 좋겠지만,
이미 학습된 모델을 사용해서 적용해보자.
이번 포스팅의 절차는 아래와 같다.
- yolo v5_ros package 다운로드 및 설정
- yolo v5 topic 확인
- 모델 출력 시각화
- launch 파일 생성
1. yolo v5_ros package 다운로드 및 설정
먼저 ROS를 통해 실행할 패키지를 다운받자. catkin_ws/src에서 실행해준다.
catkin_create_pkg yolov5_ros rospy roscpp std_msgs sensor_msgs message_generation
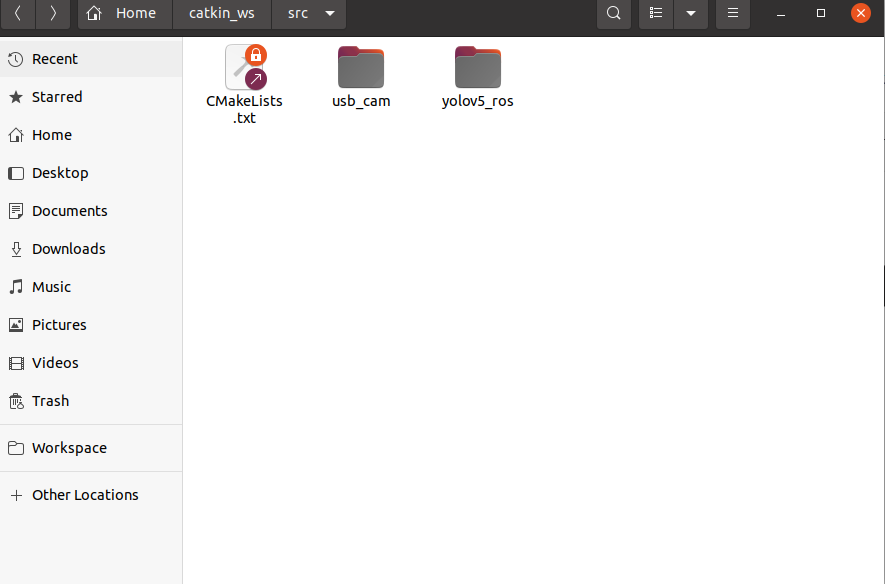
그러면 아래와 같이 yolov5_ros 파일이 생성될 것이다.
이제 학습된 YoLo v5 모델을 다운받아보자. yolov5_ros/src에 아래 링크를 git clone 해준다.
git clone https://github.com/ultralytics/yolov5
다운이 완료되면, yolov5라는 폴더가 생성된다. 해당 폴더로 들어가서 모델 사용을 위한 추가 모듈을 설치해줘야한다.
아래의 코드를 실행해주자.
pip3 install --ignore-installed PyYAML
pip3 install -r requirements.txt
이제, 모델에서 출력한 결과를 message로 정의해줘야한다. 다시 yolov5_ros로 가서 msg 폴더를 만들어준 뒤, 사전에 정의된 Bounding box msg들을 다운받아주자. 아래의 코드를 순서대로 실행한다.
mkdir msg
cd msg
wget https://raw.githubusercontent.com/raghavauppuluri13/yolov5_pytorch_ros/master/msg/BoundingBox.msg
wget https://raw.githubusercontent.com/raghavauppuluri13/yolov5_pytorch_ros/master/msg/BoundingBoxes.msg
그리고 새롭게 생성된 msg 파일들을 CMakeLists.txt 에 입력해줘야한다. yolov5_ros의 CMakList를 열어보자.
사진을 참고하여 'Declare ROS messages, services and actions' 의 하단에 아래 코드를 붙여넣자.
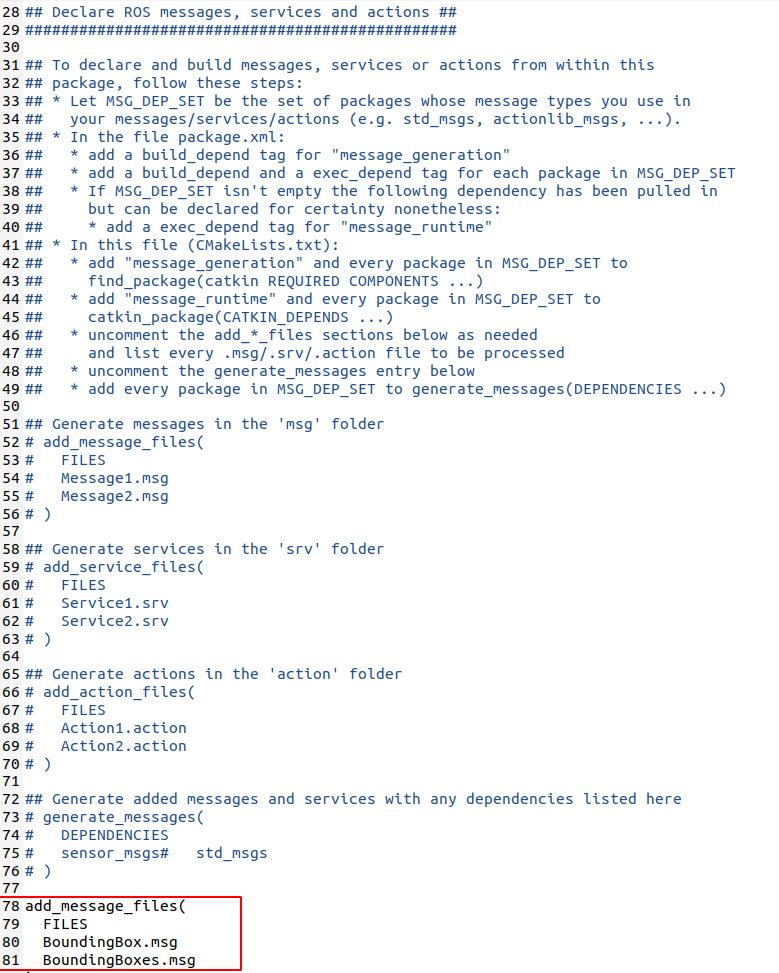
add_message_files(
  FILES
  BoundingBox.msg
  BoundingBoxes.msg
)

generate_messages(
  DEPENDENCIES
    geometry_msgs
    sensor_msgs
    std_msgs
)
수정이 끝났다면, catkin_make를 실행해주자.
이제, usb_cam의 image를 모델로 넘겨주는 코드가 필요하다. yolov5_ros/src로 이동해서 아래 코드를 저장해주자.
해당 코드는 https://github.com/mats-robotics/yolov5_ros/blob/main/src/detect.py 의 detect.py 코드를
일부 수정해서 사용하였다.
수정된 코드는 아래와 같다.
#!/usr/bin/env python3

import sys
import os
import time
import rospy
import numpy as np
import torch
import torch.backends.cudnn as cudnn

from pathlib import Path

from sensor_msgs.msg import Image
from yolov5_ros.msg import BoundingBox, BoundingBoxes

FILE = Path(__file__).resolve()
ROOT = FILE.parents[0] / "yolov5"
if str(ROOT) not in sys.path:
    sys.path.append(str(ROOT))  # add ROOT to PATH
ROOT = Path(os.path.relpath(ROOT, Path.cwd()))  # relative path

from models.common import DetectMultiBackend
from utils.general import (
    check_img_size,
    non_max_suppression,
    scale_boxes
)
from utils.torch_utils import select_device
from utils.augmentations import letterbox


class Yolov5Detector:
    def __init__(self):
        self.conf_thres = rospy.get_param("~confidence_threshold", 0.75)
        self.iou_thres = rospy.get_param("~iou_threshold", 0.45)
        self.agnostic_nms = rospy.get_param("~agnostic_nms", True)
        self.max_det = rospy.get_param("~maximum_detections", 1000)
        self.classes = rospy.get_param("~classes", None)
        # Initialize weights
        weights = rospy.get_param("~weights", "yolov5s.pt")
        # Initialize model
        self.device = select_device(str(rospy.get_param("~device","cpu")))
        self.model = DetectMultiBackend(weights, device=self.device, dnn=rospy.get_param("~dnn", True), data=rospy.get_param("~data", ""))
        self.stride, self.names, self.pt, self.jit, self.onnx, self.engine = (
            self.model.stride,
            self.model.names,
            self.model.pt,
            self.model.jit,
            self.model.onnx,
            self.model.engine,
        )

        # Setting inference size
        self.img_size = [rospy.get_param("~inference_size_w", 640), rospy.get_param("~inference_size_h", 480)]
        self.img_size = check_img_size(self.img_size, s=self.stride)

        # Half
        self.half = rospy.get_param("~half", False)
        self.half &= (
            self.pt or self.jit or self.onnx or self.engine
        ) and self.device.type != "cpu"  # FP16 supported on limited backends with CUDA
        if self.pt or self.jit:
            self.model.model.half() if self.half else self.model.model.float()
        bs = 1  # batch_size
        cudnn.benchmark = True  # set True to speed up constant image size inference
        self.model.warmup(imgsz=(1 if self.pt else bs, 3, *self.img_size))  # warmup

        # Initialize subscriber to Image topic
        rospy.Subscriber('usb_cam/image_raw', Image, self.callback)
        self.pred_pub = rospy.Publisher(rospy.get_param("~output_topic", "/yolov5_ros"), BoundingBoxes, queue_size=10)

    def callback(self, img_msg):
        dtype = np.dtype("uint8")
        dtype = dtype.newbyteorder('>' if img_msg.is_bigendian else '<')
        img_cv = np.ndarray(shape=(img_msg.height, img_msg.width, 3), dtype=dtype, buffer=img_msg.data)
        if img_msg.is_bigendian == (sys.byteorder == 'little'):
            img_cv = img_cv.byteswap().newbyteorder()
        im, im0 = self.preprocess(img_cv)

        im = torch.from_numpy(im).to(self.device)
        im = im.half() if self.half else im.float()
        im /= 255
        if len(im.shape) == 3:
            im = im[None]

        pred = self.model(im, augment=False, visualize=False)
        pred = non_max_suppression(pred, self.conf_thres, self.iou_thres, self.classes, self.agnostic_nms, max_det=self.max_det)

        det = pred[0].cpu().numpy()

        bounding_boxes = BoundingBoxes()
        bounding_boxes.header = img_msg.header
        bounding_boxes.image_header = img_msg.header

        if len(det):
            det[:, :4] = scale_boxes(im.shape[2:], det[:, :4], im0.shape).round()
            for *xyxy, conf, cls in reversed(det):
                c = int(cls)

                bbox_msg = BoundingBox()
                bbox_msg.Class = self.names[c]
                bbox_msg.probability = conf
                bbox_msg.xmin = int(xyxy[0])
                bbox_msg.ymin = int(xyxy[1])
                bbox_msg.xmax = int(xyxy[2])
                bbox_msg.ymax = int(xyxy[3])

                bounding_boxes.bounding_boxes.append(bbox_msg)

        self.pred_pub.publish(bounding_boxes)

    def preprocess(self, img):
        img0 = img.copy()
        img = np.array([letterbox(img, self.img_size, stride=self.stride, auto=self.pt)[0]])
        img = img[..., ::-1].transpose((0, 3, 1, 2))  # BGR to RGB, BHWC to BCHW
        img = np.ascontiguousarray(img)

        return img, img0


if __name__ == "__main__":
    rospy.init_node("yolov5", anonymous=True)

    detector = Yolov5Detector()

    rospy.spin()
파일을 detect.py로 저장하고 실행 권한을 부여해주자.
chmod +x detect.py
다시 yolov5_ros의 CMakeList로 돌아가서, 새로 추가된 detect.py를 추가해주자.
Install 섹션의 하단에 아래의 코드를 추가해준다.

catkin_install_python(PROGRAMS
  src/detect.py
  DESTINATION ${CATKIN_PACKAGE_BIN_DESTINATION}
)
이전과 마찬가지로 catkin_make를 해준다.
2. YoLo v5 topic 확인
이제 usb_cam과 yolo v5가 잘 연결되어서 이미지가 넘어가고 있는지 확인해보자.
먼저 터미널을 열어서 roscore를 실행시켜준 뒤, 다른 터미널을 하나 열어서 아래의 코드를 실행시켜주자.
roslaunch usb_cam usb_cam.launch
그리고 또 다른 터미널을 열어서 아래의 코드를 실행해주자.
rosrun yolov5_ros detect.py
정상적으로 실행된다면 아래와 같은 화면을 볼 수 있다.

이제, yolov5가 결과를 잘 publish 하고 있는지 살펴보자.
또 다른 터미널을 열어서 rqt_graph를 확인해보자.
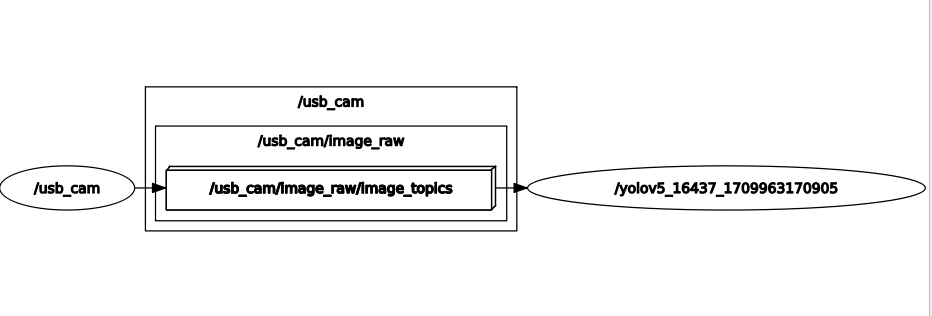
usb_cam의 이미지가 yolov5 모델로 잘 넘어가고 있는 것을 확인할 수 있다.
3. 모델 출력 시각화
이제, 실제 모델의 출력을 시각화 해보는 코드를 작성하자. detect.py 코드와 같은 위치에 다음 코드를 작성해주자.
#!/usr/bin/env python3

import sys
import numpy as np
import cv2
import rospy
import message_filters
from cv_bridge import CvBridge

from sensor_msgs.msg import Image
from yolov5_ros.msg import BoundingBoxes

class ImageView:
    def __init__(self):
        image_cb = message_filters.Subscriber('usb_cam/image_raw', Image)
        yolov5_cb = message_filters.Subscriber('/yolov5_ros', BoundingBoxes)

        self.image_pub = rospy.Publisher('yolov5_img', Image, queue_size=10)

        self.bridge = CvBridge()

        ts = message_filters.TimeSynchronizer([image_cb, yolov5_cb], 10)
        ts.registerCallback(self.callback)

    def callback(self, img_msg, bbox_msg):
        img_cv = self.bridge.imgmsg_to_cv2(img_msg, "bgr8")

        for bbox in bbox_msg.bounding_boxes:
            cv2.rectangle(img_cv, (bbox.xmin, bbox.ymin), (bbox.xmax, bbox.ymax), (255,0,0), 2)

        img_msg_out = self.bridge.cv2_to_imgmsg(img_cv, "bgr8")

        self.image_pub.publish(img_msg_out)


if __name__ == "__main__":
    rospy.init_node("model_out", anonymous=True)
    control = ImageView()
    rospy.spin()
파일을 view_img.py로 저장해주고 실행 권한을 바꿔준다.
chmod +x view_img.py
그 후 다른 터미널을 열어 아래의 코드를 실행시켜주자. (단, detect.py가 실행되고 있어야한다!)
rosrun yolov5_ros view_img.py
이제, rqt_image_view를 통해 결과를 보면 아래와 같은 결과를 얻을 수 있다.

성공적으로 마우스랑 손에 bounding box가 쳐지는 것을 확인할 수 있다.
4. launch 파일 생성
앞선 과정에서 우리는 모델 결과를 보기 위해 여러 개의 터미널과 여러 번의 코드를 입력했어야했다.
특히 rosrun을 총 3번을 실행해야하는데... 상당히 귀찮을 것이다. 따라서, detect.py와 view_img.py를 묶어서
실행하도록 launch 파일을 만들 것이다.
먼저, yolov5_ros 파일로 가서 launch 파일을 생성해준다.
mkdir launch
그리고 아래의 코드를 작성해서 yolov5_img.launch 파일로 저장해주자.
<launch>
    <!-- Run detect.py -->
    <node pkg="yolov5_ros" type="detect.py" name="detector" output="screen">
        <param name="some_parameter" value="value"/>
    </node>

    <!-- Run view_img.py -->
    <node pkg="yolov5_ros" type="view_img.py" name="viewer" output="screen"/>
</launch>
이제 복잡하게 detect.py와 view_img.py를 rosrun해주지 않아도 저 launch파일만 실행해주면 된다.
다만, roslaunch yolov5_img.launch를 해주면 roscore가 또 켜지는데 이게 무슨 문젠지는 모르겠다....
roscore는 어떤 터미널이던지 하나로 공유되는 것으로 알고 있는데, 혹시 문제를 해결한다면 추가 포스팅하겠다.
'Object detection' 카테고리의 다른 글
| [Mask 착용] YOLOv8로 마스크 착용 유무 판별하기-1 (0) | 2024.05.01 |
|---|---|
| [Penn-Fudan] Object detection 학습하기 - 3 (1) | 2024.03.13 |
| [Penn-Fudan] Object detection 학습하기 - 2 (0) | 2024.03.12 |
| [Penn-Fudan] Object detection 학습하기 - 1 (0) | 2024.03.12 |


